Veggie Prints

IMG_0270.JPG

Veggie prints are easy, even for toddlers. We all remember potato printing, but there are lots of

other vegetables that work well too::halved pears, oranges, celery hearts (with an elastic band

securing the bottom), apples and corn. You’ll need an assortment of vegetables, some acrylic

paper made a little thinner with water, some large format paper (we used newsprint) and a tray or

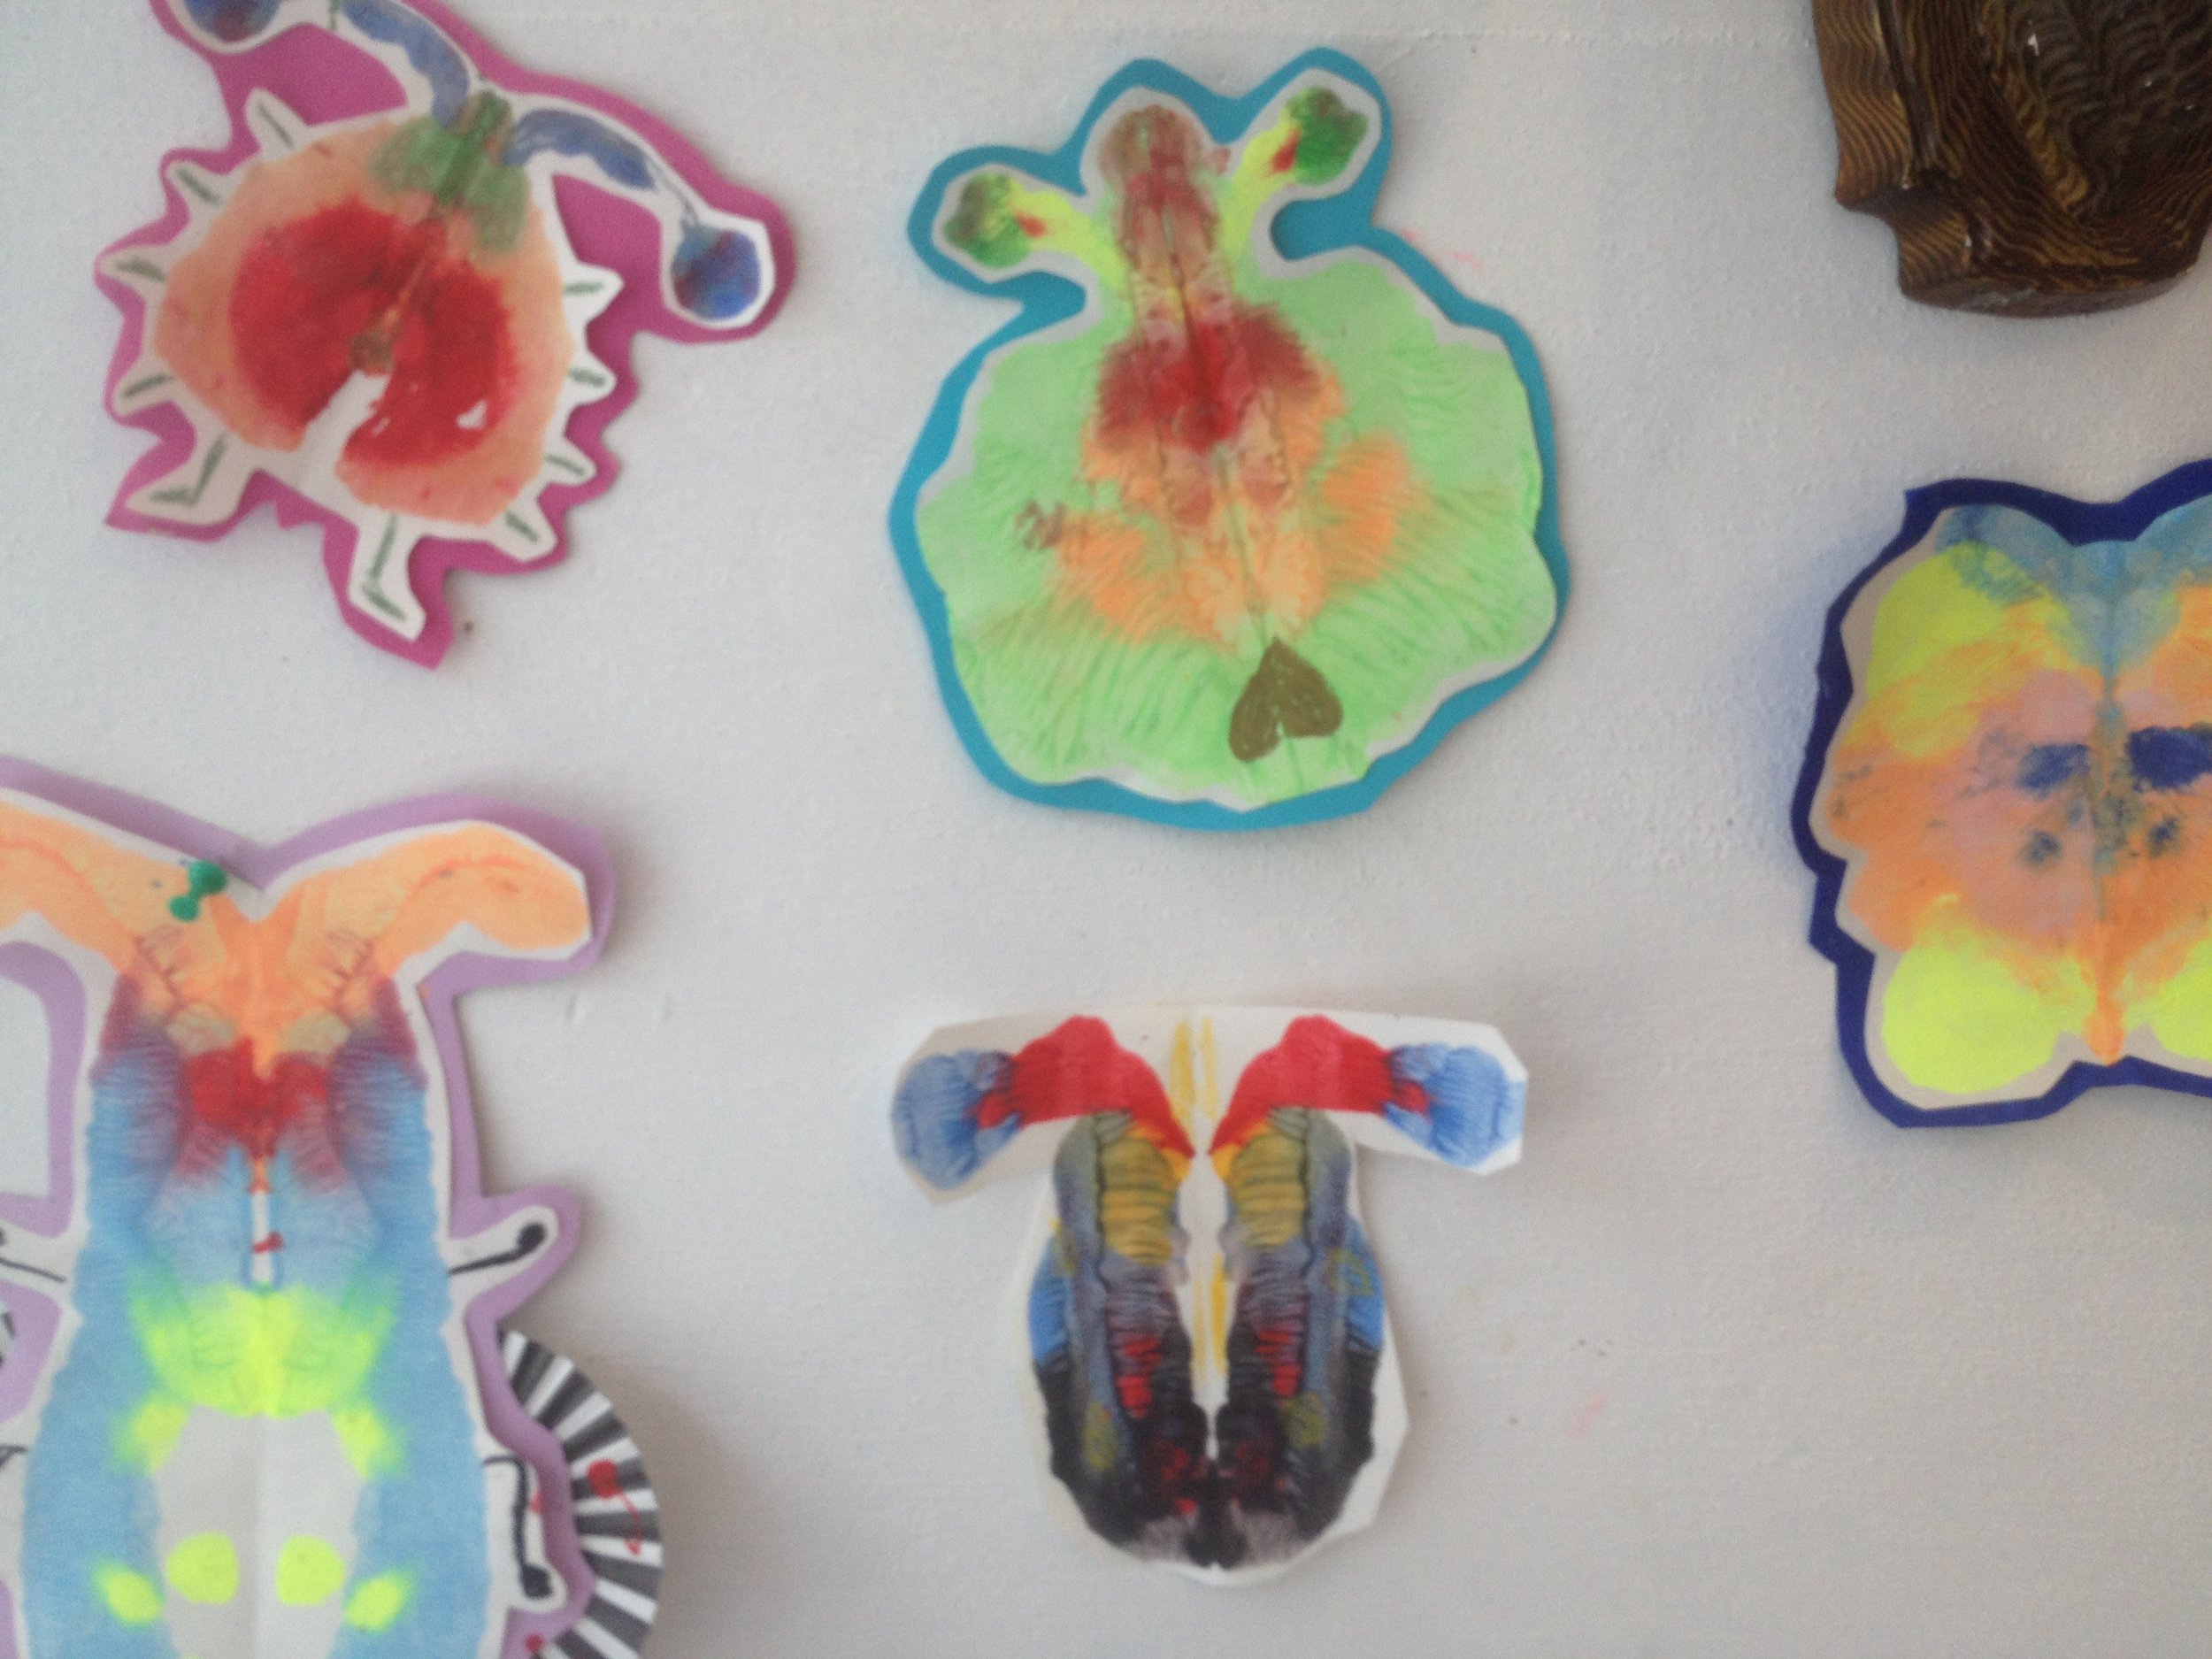
palette to contain the paint. Mix up a few colors and show kids how to dip the vegetable into the

paint and press it onto the paper. After they dry, you can cut them up and try to make a

composition out of them, seeing what narrative the shapes suggest. We made these little boats

with celery heart waves and added the toiler roll sails with a bit of white glue. Happy printing!

Check out more ideas for wonderful, easy Summer crafts at thegreenbrush-be.com

Coffee Filter Flowers

IMG_0695.JPG

Kids love it when there is some transformative element in their craft and this easy, pretty Summer

craft definately fits the bill. You’ll need some white coffee filters cut up into flower shapes or

circles, some felt pens, some string, glue, a spray bottle and a branch. First color the entire

surface of the filter paper with your felt pens , making it as colorful as you can. When this is

complete, place your drawing on a towel and spray it until the ink runs together (but not so much

that the ink runs off-you’ll get the hang of it. Kids love this part) Once the colors have run, place

the paper over top of something that might give it a flower shape-we used toilet rolls with a string

tied on onto it to keep the edges down but anything to give some depth will do-you can also skip

this part if you have nothing handy. Make about 4-5 flowers and leave them to dry-it takes about 2

hours. A good time to head outside and find a branch you like to glue the flowers onto. We also

glued on some green paper leaves. A glue gun works best to glue the flowers and leaves on, but

strong white glue does the trick as well. Some kids with siblings pooled their resources and made

a “family branch” with tons of flowers, others wanted to string the flowers up and let them

cascade down. Either way, kids 4-10 loved this craft.

Recycled Robot

Recycled Robots

This activity stirs the imagination of kids of all ages. Before starting I found it helpful to have a talk about what powers your robot-this inspired kids to create all kinds of interesting devices to make their robot “work”-whether it was plant energy or bubble jets under the sea. Let this guide you in putting out materials to use. Some of the things we put out were small boxes (mini cereal or match boxes for the interior of the robot), old keys, clogs, straws, small plastic toys, beads, metal pot scrubbers for the hair, google eyes and all kinds cardboard scraps. We painted our cardboard first and then I had the kids design their robot on that first before I glued everything down with the glue gun. The basics for what you need are: 

A small panel of recycled cardboard to glue your robot on, small boxes for the body and head for the robot, robot-y bits and pieces (aforementioned)and a glue gun.

FullSizeRender_1.jpg
Posted on February 26, 2018 .

Large Tipi

This craft is project that is more fun to build together, as details will occur to you as you work. The first step is a trip to the forest to gather 5 strong but light sticks, as straight as possible.You might also want to grab some moss and pine cones while you are out there. You tipi can be as large or small as you like. Aside from the sticks, here’s what you’ll need:

Strong rubber elastic, various twine or string from around the house, various coloured paper, scissors, tape and any bibs and bobs you might have hanging around-pompoms, beads, paint etc. The first step is to decorate your sticks; paper is more painless than paint-cut some long, skinny strips of paper and secure one end with tape, wrapping it as you go to make stripes and securing with more tape at the end. Once all your sticks are decorated, hold therm all loosely together in one hand and arrange them on the floor or tabletop from the bottom-attempting to make sure all the branches touch the surface kind of evenly and also that they are spread apart in a circular tipi. Once balance is ok, wrap the top branches together with the elastic, or bind with twine. Now your basic shape is built and you can think about fun details-moss observatory? Hammock? Personalised flags? You can weave as much or as little as you like onto your basic structure using string, paper or extra malleable branches like cedar. 

Posted on July 24, 2017 .

Ink blot bugs

This is good activity for all age groups-from toddlers to adults because its always a thrill to see what happens when you unfold your paper. You will need:
4-5 eye droppers, acrylic paint or liquid watercolours, standard white paper, scissors, glue heavier card stock and transparent papers (optional)

First fold a bunch of the white paper in half. Then in several small cups, dilute the paint until it can be pulled up easily with the eyedropper while still staying vibrant. Runny is no good, the paint has to have flow-y yet have blobby consistency. Mix the colours well for each cup and place an eyedropper in each one, explaining that this dropper is just for this colour. Open your paper and with your eyedropper draw out a bug in lines and blobs on one side of the paper only. Include insect details like antennae and spots.The coolest bugs we made had both light and dark colours next to one another. Draw out your bug in careful blobs and lines without using too much paint. When you are ready, squish your bug by folding the dry side onto the wet side and open to reveal your pattern. Make 3-4 at a go, because it will take about 30-45 min for them to dry. After that you can stick them on the heavier card stock if you chose (looks nice with a 1/2 inch edge on it) or just get out the scissors to cut out your bug and add legs and transparent wings or any small details. 

How does your garden grow?

How does your Garden Grow?


This is craft for everybody and kids really respond best when you get involved. Begin by challenging yourselves tocover the whole paper and if you can, leave it up for some time and add to it-it's a great exercise for kids to not necessarily think of art having to be finished or perfect.

What you’ll need:

A roll of paper, craft or white

scissors and glue stick

cupcake liners, plain or decorated

various coloured bits of paper-construction paper, leftover wrapping, magazines, etc

Paint-Watercolour or acrylic and small brush or corks for stamping

crayons

Either tape up your big sheet of paper on the wall or lay it out on the table.  Cutor draw a few plant stems onto the paper to start. Begin adding leaves, dirt, blossoms and bugs in any media. The cupcake liners make great 3-D flowers. Keep adding until you are happy with the result.

Hot Air Ballon mixed Media

This is a versatile craft that is fun even for toddlers, just explain to them that the colourful side the paper has to be facing out :)

you’ll need:

Strips of coloured paper, cut into 6-7 inch strips, different thicknesses

scissors and a cutting knife/blade,

large sheet of white or blue paper

glue stick

crayons,felts

With a pencil, draw out the outline of a hot air balloon; make it big, it will be the focal point. Use the blade to cut out the interior of the balloon.  Cut out the balloon part only and save the interior bit. D Colour in the sky and draw he basket of the balloon. Encourage your kid to think about what time of day it might be and what could be in the sky-sunset, night, birds, plane,etc. When the drawing is done, flip it over and starting at the top of the balloon, begin to glue the strips of paper, coloured side facing out, over the empty space until it is completely filled. Flip it over and you are ready to add whomever will be riding in the balloon. Use the leftover paper from the interior to draw a small figure or animal to go inside the basket and glue that on as well. I used old fake-wood drawer-liner material for the basket but you can use any interesting paper.

Posted on April 13, 2017 .

Natural brushes and process painting

FullSizeRender.jpg

Natural brushes


This activity has it all. Its interactive, as kids will search for their own materials to make the brushes. It engages them in a way that is immediate and very freeing and it encourages them to be curious about all kinds of mark-marking. Here’s what you’ll need:

Some long-ish sticksfrom the forest/park 

sturdy string

roll of paper, any color

ink or acrylic paint

small buckets/bowls for the paint

a large open space, preferably outside


If inside, tape down your paper, kids should be able to paint from all sides. If outside, weight your paper down with small stones on the corners.

Gather some long,straight sticks and put them in a pile. Together, search the outdoors for natural elements that you could tie to the end of your sticks that you think might make an interesting mark- pick things that leave wispy, feathery marks and things that will leave more blobby, thing-like marks. Some things we tried were: feathers, berries (still attached to their branch), pine tips, small bouquets of flowers,etc. Cut yourself a length of string that will allow you to wrap it around the stick quite a few times. As you are wrapping it, keep some tension as you want to give it them as sturdy a base as you can.  If its a bunch of things, like berries or flowers, try to thread your string through a few times to give it more even stability. Tie a knot and the brushes are ready.

Between 1-3 pots of color is enough to work with-try to encourage painters mot to double-dip colorsas this makes the colors muddy faster. Other than that-let them go for it.

Note: The only real drawback to doing this inside is how much kids love to splatter with their brushes so…just something to keep in mind.

Posted on April 13, 2017 .

Cherry Blossoms

Cherry blossoms


This craft is always a hit- suitable for ages 5 and up. You will need:

Heavy white paper

large straws

scissors

ecoline ink or acrylic paint

cork

small sponge for painting, or late brush, H20

chinese black ink

Optional: pink tissue paper 

With either ink or acrylic paint, make a degradee from dark to light blue. Using your sponge,paint a intense band of color at the top of your paper, and then dab with a little water to gently soften the color all the way to the bottom. Let it dry.

Chinese ink is intense black, the same ink calligraphers use. A little goes a long way. Before we use it, first trim your straws down to less than 4 inches. Next, using a paint brush, make a small resevior of ink where you want the base of your tree to be. Working quickly, sort of get behind the ink blot by blowing at the bottom of it with the straw. Blow in an upwards motion. The ink will create thetrunk of your tree. Follow the line as far as you like, and where you want a new branch to begin, do the same as before-begin with a small ink reservoir and blow to create new growth. The results are random but you can manipulate it somewhat with practise. Let dry. Put out a dollop of both red and white paint and drip your cork into each.Without blending, stamp where you would like the blossoms to be. If you like, add extra depth by gluing on twisted bits of tissue to bring out the flowers in your cherry trees.

For more craft ideas visit: thegreenbrush-be.com


Posted on March 2, 2017 .

pop bottle planters

Pop-bottle Planters


This is a craft that’s easy for toddlers and older artists too. Here’s what you’ll need:


empty plastic bottle

carpet knife

acrylic paints and brushes

water, rag

soil, sand or rocks 

light gage wire or s-hook

plants-basil, nasturtium, etc, either from seed or as seedlings


Cut the top off your bottle with a knife as cleanly as possible. Assemble your paints and brushes. You can paint two ways: for a more finished look, decorate the inside of the plastic bottle. Little ones will find it easier to paint the outside. Let dry. Poke a hole about 3 inches down the side of the bottle and thread through with the wire or s-hook, so you can hang it later. 

For the plants-all plants need drainage. Pour a handful of small stones or sand in first, then follow with soil. Plants that drape over the sides of pot will look the best. The Summer is over but Belgium has a very mild climate, so you can really grow plants at almost any time of year. Hanging herb gardens are great and you can vary the sizes of the bottles to make a nice display when hung together.


Posted on March 2, 2017 .